A control circuit for the chandelier with a fan is included with the product and should be included in the packaging. In the latest modifications of electrical products, the manufacturer does not provide an operation diagram, but shows a connection diagram. This way he protects his products from counterfeiting.
The simplest schematic diagram of a chandelier with a fan and its connection to the electrical network is shown in Figure 1.
The principle of operation is that when you turn on the power using a single-key switch, the electric light and fan are turned on simultaneously, i.e. The light is on and the fan is spinning.
A slightly complicated circuit diagram for connecting a chandelier is shown in Figure 2. 
Here the operating principle is separate, i.e. When you press one key of the switch, the light comes on, when you turn on the other, the fan runs. The fan operates regardless of the state of the lamp.
Connecting a chandelier with a fan to the electrical network comes down to the correct connection of the wires and this is a necessary condition for its operation. Depending on the type of grounding, a different number of wires come into the apartment and, accordingly, to the devices. For apartments of old construction, the TN-C grounding system is used, which is shown in Figure 3 (click to enlarge). 
The main thing in this system is that two wires come into the apartment - phase and zero (PE and N conductors are combined). To connect a chandelier with a fan, you need to connect conductors N and PE on the terminal block of the distribution box according to Figure 4 (click to enlarge).


In this system, three wires come into the apartment - phase, neutral and ground. The PE conductor allows you to ground all equipment in the apartment and equalize the potentials. This system is modern and well protects people and electrical appliances in the house from the effects of electricity. Used to connect modern devices.
It is not possible to consider each of the chandelier circuits with a fan due to the huge number of manufacturers who expand the capabilities of the product. Chandeliers with a fan are found on sale and each of them has individual capabilities, control circuits and connections:
1. Chandelier with direct switching (Fig. 1);
2. With separate switching on of the chandelier and separate switching on of the fan (Fig. 2);
3. Fans with different blade rotation speed modes, with the ability to select a mode on a chandelier or multi-key switch.
4. Using optical sensors to turn on the fan and electric light, depending on the illumination of the room;
5. With a remote control unit, programmable settings: fan rotation speed, lamp brightness, depending on the light level, with the ability to set the on and off time for both lamps and the fan.
Chandeliers with a large number of lamps, with upper and lower light, have the same operating principle.
To properly turn on a chandelier with a fan, you must carefully read the connection diagram and follow the operating instructions or instructions for use.
Similar materials.
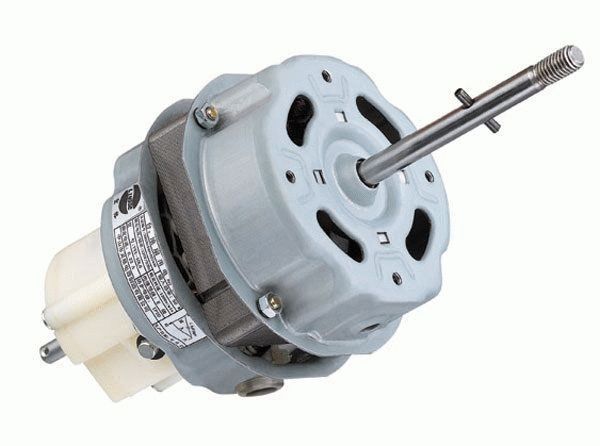
I got a substandard West SF-1602T fan (with a mechanical timer) made in China, sold by our company Ost-West, almost for free. The approximate cost of a similar one is about $20. The motor windings did not ring. For external wires only gray-blue 0.1k. The external capacitor has one end to the black common and the other to just one terminal from the windings (after opening, see below). Nothing more useful. I removed the rear engine casing (the rotating mechanism and external capacitor are still screwed onto it) and the middle part (plates with coils). The front casing with the rotor remained on the front panel of the fan as there was no need for manipulation.A detailed inspection of the conductor contacts revealed several breaks (as if rotted) of the coil leads under the cambrics. Restored contacts. Added definition: black (general)-red 1.0k. Naturally nothing works.
As a result, an almost vandal attempt was made, but the only one, therefore the correct option (already doubtful) was to unsolder all the terminals of the coils. I didn’t think about resoldering the remaining contacts just in case, because it was already too late. I drew the conclusions with an accuracy of 99%. Three conductors came out from almost the same point - I didn’t sign them (well, it was inconvenient), I just sketched the location. After releasing the winding terminals from captivity, everything began to ring. Four windings - 1.0k, 0.2k, 0.1k and 0.7k. Using my sketches and logical calculations (about three conductors from one point), I reconstructed the connection diagram for the windings and capacitor (see figure)
Sketch of winding terminals: 
Just in case, for possible connection experiments, all eight terminals of the windings using twisted pair cables (conveniently by color) were brought out of the motor casing. On the windings, I insulated all the wires with heat shrink and secured them around the circumference with a thick thread (as it was).
Reassembled in reverse order). Everything worked.
But the engine gets very hot!!! After five to ten minutes it’s already hot. It’s bearable to wrap your hand around, but the iron plates are hotter, and you can’t hold your finger on them for long. Where's the joint?
I checked the rotor grout. I pulled the iron together normally. It couldn't have worked out better. The free movement seems to be good. This takes into account the fact that the design is without bearings, on ordinary bushings. I repeat, the circuit was almost certainly restored to the original one. If necessary, I will give my sketch of the winding terminals (for electricians who have been smoking the topic)). The photo will not be available due to lack of the necessary device. Maybe the Chinese robot got it wrong? Maybe I need to connect it differently? Extending the ends of the windings 20 cm beyond the motor should not seem to affect heating. I checked the resistance on the plug of a similar but working fan (with a timer) - approximately the same (1.3k-1speed, 1.2k-2speed and 1k-3speed). On simple fans, the resistance is two times less. It seems that the starting winding with a capacitor can be used as a working winding if the device power is no more than 1.5 kW. If the windings are connected to each other in some other way, then this will no longer be an original circuit. But maybe it will be better? Or maybe this is how it should be heated (not sure)?
I ask the guru for help!
Thread with identical engine here
In recent years, ceiling fans have become much more attractive in appearance. Its function is very simple, and it does an excellent job of cooling the air in a particular room. Moreover, it plays a key role in creating a complex ventilation system. But its main purpose should not be confused: it cools not the room, but the people. And ceiling models cope well with the task. In this article we will look at how to connect a ceiling fan, its advantages and design, and also present connection diagrams.
Advantages
There are many space cooling systems. Let's look at some of the positive qualities of ceiling fans:
- Unlike air conditioning systems, ceiling fans consume 40% less electricity.
- You can have several fans at once in the house and even in one room.
- Easy to install.
- Unlike an air conditioner, it has a significantly lower price, and the quality of cooling does not deteriorate as a result.
- There are models combined with a chandelier. They are especially often installed in the kitchen.

To make it easier to understand the installation of a ceiling fan, let's look at some of the components of the fan.
Device

For many years, the design of a ceiling fan has remained the same. Therefore, in each individual case it will not be difficult for you to understand their different models and types. Components of a ceiling fan:
- Electric motor. Due to high-quality bearings, the fan can spin around the clock, while consuming a small amount of electricity.
- Frame. The housing for the electric motor can be made of plastic or metal. More expensive models have a sealed housing, which prevents dust from entering the engine. Accordingly, the service life increases.
- Blades. Their number ranges from 3 to 6. Some designer ceiling fans have up to 15 blades. But in this case, the ceiling fan becomes more of a decorative item. Blades can be made of wood, metal, plastic and other materials.
- Lanka (or iron). It connects the blades to the engine. In all cases, it is made of metal.
- Ceiling mount. The fastening will depend on the ceiling material (concrete, wood, etc.)
- Barbell. The rods can be of different lengths up to 1.5 meters. Used for hanging an item.
- Caps. The caps cover the mount on the rod from the bottom and top. The cap hides various electrical fittings.
- Decorative overlays. Close the mounting screws on the fan.
- Regulators, remote controls and switches. Depending on the configuration and model of the ceiling fan, the presence of the remote control and other controls may vary.
Note! The optimal fan installation height from the floor is 2.3 meters!

The entire work of installing a ceiling fan does not have complicated processes. Before starting work, turn off the electricity. This will prevent the possibility of an accident. Afterwards, a support strut is mounted on the ceiling. The weight of the fan can vary, so the spacer must be attached to the base of the ceiling, for example, if the ceiling is made of plasterboard. The hole in the drywall is made according to the size of the junction box that will be installed later.
The next step is time to secure the bracket with a few screws. The wiring that comes out of the box must be identified. Typically, the fan has thin copper wires. They should be connected according to the zero and phase diagram. Each connection can be secured with a decorative cap. All wires should be carefully placed in the junction box and covered with a lid. Now the fan blades and the lamp, if present in the structure, are mounted. A bracket is also used for this. Using decorative caps, close all electrical connections on the rod from the bottom and top.

Note! The fan can be turned on using a key along with turning on the light in the room. Its operation can also be adjusted using remote control. It all depends on the model you choose.
So, as you can see, connecting a ceiling fan with your own hands is not particularly difficult. In most cases, the device comes with detailed instructions from the manufacturer. Therefore, you should not have any particular difficulties with this work. Leave your comments if you already have enough experience in ceiling fan installation work.
Let's look at repairing a floor fan with our own hands, using the example of a typical product from the Krasnodar plant. There is nothing complicated inside, but it is not easy to immediately describe the method of adjusting the rotation speed. The design is average. The relatively heavy body tramples on the weightless leg, sensing the slightest push, the product falls. The situation is aggravated by lying carpets. The four plastic supports scattered at the corners of the thin steel cross do not help. The stand is fragile, bends easily, and is supported by snot. Therefore, the first recommendation is not to deal with products that have mechanical instability, so as not to become infected with mental instability. Bork products are equipped with fall protection, but not products from the Krasnodar plant. However, the motor will not burn out in case of excess, there is protection...
Design of a typical floor fan
Do-it-yourself floor fan repair is on the agenda! You should start small: the simplest fans do not have a ground terminal. The device does not have a degree of electrical safety. The floor fan device includes a housing made of plastic. If water gets inside, expect a good shake. This type of floor fan should not be used near water. Starting with an aquarium with fish, ending with a flower vase. Particularly dangerous where small children live. If the thing falls, the child will guess to pour milk inside... Draw your own conclusions:
- the structure is unstable;
- the base breaks easily and bends;
- There is no protection against electric shock.
If a floor fan falls, there is a high probability that nothing will happen. Let's dive inside the structure. Let's leave aside for now the features of regulating the engine speed and buttons. Let's talk about the gearbox. The Krasnodar floor fan carries one asynchronous capacitor motor. The front side of the shaft is connected to the blades through a pin and a nut with a left-hand thread, the rear side goes to a gearbox formed by two gears, one double.

The shaft is equipped with a thread that engages the teeth of a large wheel as it rotates. The moment is transmitted to the small wheel, which drives the flywheel. The gear of the crank mechanism is the diameter of a hand, so the rotation is inferior to the speed of the original shaft of the asynchronous motor.
- The blades spin at full motor speed.
- The crank mechanism, thanks to the gearbox, moves more slowly.
Through the cardan transmission, the crank is hooked to the leg, the engine housing is mounted on the axle. When the shaft of an asynchronous motor rotates, the blades move smoothly in one direction or the other. However, you can stop the process. For a double gear, the roller is attached to the larger gear by two balls with a spring inserted into a through hole. If you pull the adjuster knob directly connected to the axle, the latch slides up. The connection between the gear and shaft is lost, and rotation stops. The mechanism provides fall protection: six grooves are cut into the inner mounting hole of the drive gear. Balls fit. There are six positions, the mutual transition is accompanied by a click, the axis rotates relative to the gear, the balls hit the walls, sliding into the grooves.
Clicking sounds are heard, there is a high probability that the floor fan has fallen. The drive is jammed, it works, clicking, a protective mechanism, protecting the motor from combustion.
We believe that the mode is unfavorable for a floor fan; if you do not turn off the device, the thermal fuse of the motor will certainly break. The gearbox is attached to the engine with three bolts and has a pair of lubrication holes through which the plastic gears can be lubricated. Refers to a drive rotating at the speed of an asynchronous motor.
Headache, how to fix a floor fan and assemble it. We see the situation: the relative position of the gearbox is incorrectly set, the legs through the gear, the head of the floor fan will move asymmetrically relative to the frontal plane. Can be annoying. Attach the gearbox, check the product by connecting power. Be careful not to get an electric shock, try to visually determine the correctness of the assembly.
Floor fan motor
Inside the fan there is an asynchronous motor with regulation of the shaft rotation speed by switching the windings. A capacitor is attached to the gearbox. The radio element is not a trigger element. We believe that it is not for nothing that the windings are fastened four in two rows, shifted relative to each other by an eighth of a turn. Field rotation uses voltage phase and 90 degree shift. The equipment is useless at this point, one winding of the asynchronous motor of the floor fan will burn out, and the motor will have to be replaced. It is not possible for a beginner to wind a complex product on his own.
Speed control is performed by switching the supply voltage to the appropriate wires by switching the buttons on the stand. One core goes from the cord from the outlet to the engine, and the position of the second is selected by the operator. Only one of the speeds is pressed at a time, which is ensured by mechanical methods of blocking parallel switching. Krasnodar products are pleased with the presence of backlighting: the top button ensures that the diode lights up. Allows you to avoid collisions with a floor fan in the dark. Indirectly indicates: the manufacturer is aware of the instability of the product.
The engine is made up of an insulated silumin rotor-drum, and the wiring of the coils is sealed. The structure remains unknown for obvious reasons; the question is meaningless. We believe that the probability of rotor failure is relatively small; the armature receives power from the stator. The structure is usually represented by a squirrel cage. A set of longitudinal conductors arranged in a circle, united by two rings at the ends. At both ends of the rotor there is an impeller that blows air over the stator coils. Allows the asynchronous motor to work harder. The Krasnodar floor fan has plastic impellers.
In case of uncertainty, test the wiring from the button (without disassembling the fan), examining the underlying fault. The resistance of the working winding is never zero, it is too high. The break is not difficult to guess. The starting winding rings from the contacts of the capacitor. The direction of rotation is determined by the relative position of the starting and main windings, therefore, if you mix them up, you will get the wrong result.

Of course, if at least one winding fails, the engine will not work. One phase is not enough to accelerate the rotor. Rotate the blades clockwise (with your hand withdrawn) to identify the presence of a characteristic malfunction. The floor fan will start working - one winding has burned out. It is incorrect to talk about starting and working coils; copper coils are identical. The motor is capacitor.
Floor Fan Motor Speed Control Method
Nothing is said about the speed control method, which is not surprising. In the model considered, four wires come to the coils, one supplies a plug. The other three enter the winding through fabric cambrics. What is inside is not known for certain. The choice is small; an asynchronous motor with an insulated rotor is controlled in two ways:
- Change in voltage amplitude.
- Switching windings with an unequal number of turns.
We don’t take inverter control into account; in this case there is simply no room for such a complex circuit. What remains is regulation of the voltage amplitude. Each wire has an unequal number of turns. If one speed (two) fails, the cambrics will have to be cut, therefore, the electrical circuit of the engine will become obvious. A diligent master will wind a new coil, a lazy one will take money from the client to buy a new engine (the old one will be used for non-ferrous metal).
The number of turns is indirectly determined through the resistance ratios between the terminals of each speed. The tester uses a constant voltage to measure the quantity, so the inductive part of the impedance is eliminated from consideration. The number of turns is directly proportional to the ohmic resistance of the winding section.
How to disassemble a floor fan
From what has been said, it is clear: there is nothing to break inside the floor fan. This is the motor and capacitor. The rest falls on the mechanical part, the gearbox. If there is whistling or noise, try lubricating the gears. How to do this is clear from what has been said. There are a couple of holes in the gearbox housing for these purposes. Solid oil is suitable for plastic parts.
Repairing a floor fan yourself shouldn't be too difficult. Replace the motor with one of suitable weight and size. The main types of breakdowns concern the mechanical part; restoration is carried out using conventional (welding plastic with polyethylene) methods with skilled hands.
Air circulation is very important, so the combination of a ceiling chandelier with a fan creates optimal working conditions. Such lighting devices can provide a flow of fresh air at any time of the year. Reviews of these models indicate that the rotation of its elements does not lower the temperature in the room.
There are different prices for lighting fixtures with a fan:
- in a low price category that can be bought inexpensively;
- at an average price, based on the family budget, select the appropriate quality;
- There are luxury models, their price is quite high.
If someone wondered how to connect a chandelier with a fan independently in a three-phase network, then here you can find information on this issue.
Before you start connecting a chandelier with a fan, it is important to decide on its location so that the light falls evenly without disturbing the overall mood of the room. If you plan to connect it in place of the previous chandelier, then you can skip this point.

Next, determine the approximate weight of the chandelier and if you find that it weighs more than 13-15 kg, you need to install a beam that will help hold the chandelier. If you skip this step, you may damage the wires or the surface of the ceiling. In ordinary apartments it is unlikely that such a heavy chandelier will be found, so, most likely, you can do without installing an auxiliary beam.

Installation of distribution box
Before you start connecting the chandelier with a fan, you need to connect the junction box to the power cable. This must be done carefully and carefully, following all safety regulations.
The heart of the structure, that is, the electrical circuit, must be connected at a distance of a little more than 10 cm with the installed box; a supply of wires after connecting the cable is necessary in case of damage to the wires. Then you need to cover all the wires with a special cover. All wires must be insulated and the box must be tightly bolted.

There are already many reviews that are full of pleasant words in favor of such a design. This is not surprising, because buying such a lamp means giving yourself a soft, pleasant coolness along with gentle lighting. Air conditioners consume a large amount of electricity, which cannot be said about ceiling chandeliers-fans, which can be bought in a specialized store. For example, you can find a high-quality, sophisticated and functional model at Leroy Merlin.
Moscow stores have established themselves as reliable suppliers of high-quality designs, where you can easily find a wide variety of lighting fixtures and inexpensively. A photo of a chandelier with a fan will help you get to know the design better. In addition, the photos that are in this article can be an excellent assistant in choosing a chandelier suitable for combating stuffy and stagnant air in the room. The price of a chandelier with a fan is low compared to an air conditioner, and it is still more profitable to purchase such a design than an air conditioner and a chandelier separately.
